
Today we Will Learn How To Make Curly Cursor Using Html And Css and js
Introduction:
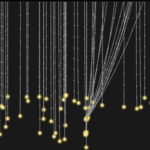
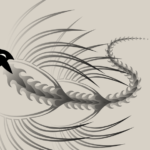
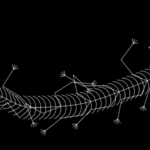
Let’s create an Interactive Cursor Trail using HTML, CSS, and JavaScript. This project will add a visually stunning and engaging effect to your website, where a trail of particles follows the user’s cursor movement. We’ll use HTML to set up the canvas, CSS to style the page and external link, and JavaScript to create the dynamic cursor trail animation. Let’s dive into building this Interactive Cursor Trail.
HTML:
This HTML code sets up a simple webpage with two main elements:
- A
<canvas>element, which will be used to draw the cursor trail animation. - A div with class
external-links, containing a “Learn More” link with an icon.
The structure is minimalistic, allowing the JavaScript animation to take center stage.
<canvas></canvas>

<div class="external-links">
    <a href="" target="_blank">Learn More
        <img class="icon" src="https://ksenia-k.com/img/icons/link.svg" alt="icon">
    </a>
</div>
CSS
This CSS stylesheet applies a clean, modern design to the webpage:
- It resets default margins and paddings for the body and html.
- Prevents overscrolling and hides overflow.
- Sets a light background color for the page.
- Styles the external link container:
- Fixed positioning at the bottom right corner.
- Semi-transparent white background with a subtle shadow.
- Rounded corners for a modern look.
/* Basic reset for body and html */
html, body {
    margin: 0;
    padding: 0;
    overscroll-behavior: none;
    overflow: hidden;
    background-color: #f0f0f5;
}

/* Styling for external link container */
.external-links {
    position: fixed;
    bottom: 15px;
    right: 15px;
    font-family: 'Arial', sans-serif;
    font-size: 16px;
    background-color: rgba(255, 255, 255, 0.9);
    padding: 12px;
    border-radius: 8px;
    box-shadow: 0px 2px 10px rgba(0, 0, 0, 0.1);
}

.external-links a {
    text-decoration: none;
    color: #333;
}

.external-links a:hover {
    color: #007acc;
}

.external-links a img.icon {
    height: 16px;
    vertical-align: middle;
    margin-left: 5px;
}
JS:
The JavaScript code creates the interactive cursor trail animation:
- It sets up the canvas and defines configuration options for the trail.
- Implements mouse and touch event listeners to track cursor movement.
- Creates an array of points that will form the trail.
- Defines an animation loop that:
- Updates the positions of trail points based on cursor movement.
- Applies physics-like behavior (elasticity and damping) to the trail.
- Draws the trail using quadratic curves for smoothness.
- Adjusts the trail’s opacity and thickness along its length.
- Handles window resizing to keep the canvas full-screen.
- Implements an automatic cursor movement when the user hasn’t moved their cursor.
const canvas = document.querySelector("canvas");
const ctx = canvas.getContext("2d");

// Initialize mouse activity tracker
let hasMoved = false;

const cursor = {
    x: window.innerWidth / 2,
    y: window.innerHeight / 2
};

const config = {
    trailLength: 50,
    lineThickness: 0.2,
    mouseVelocity: 0.7,
    elasticity: 0.35,
    damping: 0.6
};

const trailPoints = new Array(config.trailLength).fill().map(() => ({
    x: cursor.x,
    y: cursor.y,
    dx: 0,
    dy: 0
}));

// Track mouse events
window.addEventListener("mousemove", (e) => {
    hasMoved = true;
    moveCursor(e.pageX, e.pageY);
});

window.addEventListener("touchmove", (e) => {
    hasMoved = true;
    moveCursor(e.targetTouches[0].pageX, e.targetTouches[0].pageY);
});

function moveCursor(x, y) {
    cursor.x = x;
    cursor.y = y;
}

adjustCanvas();
animate(0);
window.addEventListener("resize", adjustCanvas);

function animate(time) {
    if (!hasMoved) {
        cursor.x = (0.5 + 0.25 * Math.cos(0.002 * time)) * window.innerWidth;
        cursor.y = (0.5 + 0.25 * Math.sin(0.002 * time)) * window.innerHeight;
    }

    ctx.clearRect(0, 0, canvas.width, canvas.height);

    trailPoints.forEach((point, idx) => {
        const previousPoint = idx === 0 ? cursor : trailPoints[idx - 1];
        const springiness = idx === 0 ? config.elasticity * 0.5 : config.elasticity;

        point.dx += (previousPoint.x - point.x) * springiness;
        point.dy += (previousPoint.y - point.y) * springiness;
        point.dx *= config.damping;
        point.dy *= config.damping;
        point.x += point.dx;
        point.y += point.dy;
    });

    ctx.beginPath();
    ctx.moveTo(trailPoints[0].x, trailPoints[0].y);

    for (let i = 1; i < trailPoints.length - 1; i++) {
        const midpointX = (trailPoints[i].x + trailPoints[i + 1].x) / 2;
        const midpointY = (trailPoints[i].y + trailPoints[i + 1].y) / 2;
        ctx.quadraticCurveTo(trailPoints[i].x, trailPoints[i].y, midpointX, midpointY);
        ctx.lineWidth = config.lineThickness * (config.trailLength - i);
        ctx.strokeStyle = `rgba(50, 150, 250, ${1 - i / config.trailLength})`;
        ctx.stroke();
    }

    ctx.lineTo(trailPoints[trailPoints.length - 1].x, trailPoints[trailPoints.length - 1].y);
    ctx.stroke();

    requestAnimationFrame(animate);
}

function adjustCanvas() {
    canvas.width = window.innerWidth;
    canvas.height = window.innerHeight;
}
Conclusion:
Creating an Interactive Cursor Trail using HTML, CSS, and JavaScript has been an exciting and educational journey. By combining a simple HTML structure, clean CSS styling, and advanced JavaScript animations, we’ve learned how to create an engaging visual effect that enhances the overall user experience of a website.
If Your Project is Not Working or Has Any Problem Don’t Worry, Just Click on Below Download Assets File And You Will Be Able To Get Full Control Of Our Projects , Then Customize And Use it For Your Coding Journey. Let the coding adventure begin!
By Downloading this assets You Will Be Able to create an Curly Cursor HTML & CSS Which Can Be Used For Several Projects i.e. A Flutter App Using Vs Code or For Android App Using Android Studio And Also For Custom Web Development.